Creating a LINE bot w/ Flask - Getting Started

The first case I was handed since arriving at NCKU was a LINE chatbot. It was the third (and final) year of the project and it seems like it has been written/handed down by multiple people, and collaborated with many people. So, it's kind of messy. Since I'm personally interested in creating conversational agents, I thought I might as well write down some notes in the development process and probably the technologies behind it.
Basic LINE bot Framework
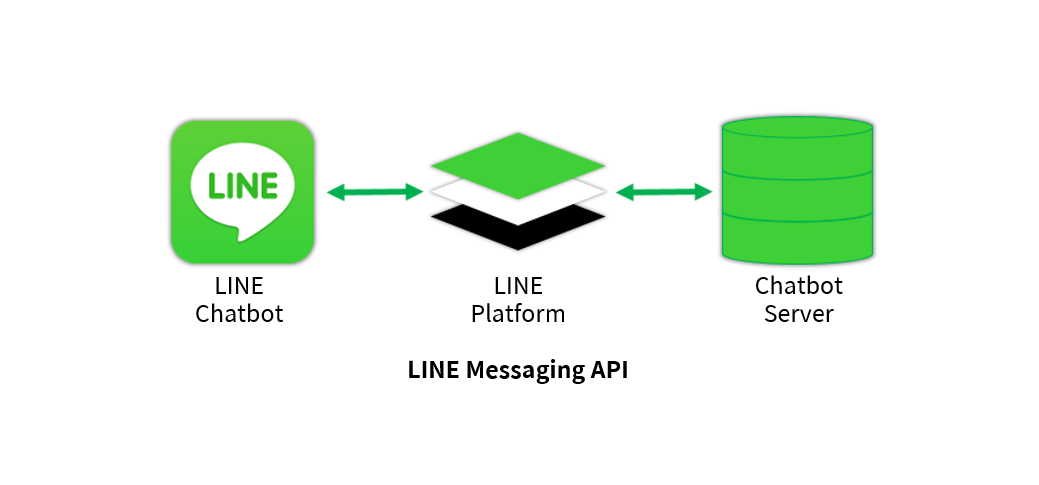
The basic structure of LINE bot is basically using LINE as an interactive platform to connect to your users. Basically, our framework would be using the LINE's messaging API to send the user's request to our web server.
LINE Developer
Of course the first part of creating a LINE bot is to have a LINE developer account. For simplicity reasons, we could just register using our LINE account by logging in here. (You could also turn your account to a business account if needed).

After logging in, you'll be taken to the providers page. Which takes us to the next step, creating a provider (project) and messaging API channel (chatbot). Do take note of the Channel Secret (Webhook ID), issue a Channel Access Token (API Token) and enable Use Webhooks in the Channel Settings.
Flask - Web App Framework
Flask is a lightweight, easy-to-use Python web framework. Since our framework is based on a web server, using Flask as the backend of the server makes things easier if you're familiar with Python.
Install Dependencies
pip install flask line-bot-sdk
After installing our dependencies, we could start writing our bot. Of course if you're new to Python, you could start of with the example code provided on LINE's GitHub. We won't be explaining the code line-by-line, but only the main concept of the control flow. The below is the code with some small tweaks I made. First thing to take note is to insert the CHANNEL_ACCESS_TOKEN and CHANNEL_SECRET.
# Import 3rd-Party Dependencies
from flask import Flask, escape, request

from linebot import (
    LineBotApi, WebhookHandler
)
from linebot.exceptions import (
    InvalidSignatureError
)
from linebot.models import (
    MessageEvent, TextMessage, TextSendMessage,
)

# Import system modules
import sys, os

# Initialize Flask
app = Flask(__name__)

# Channel API & Webhook
line_bot_api = LineBotApi("CHANNEL_ACCESS_TOKEN")
handler = WebhookHandler("CHANNEL_SECRET")

# Callback function for debugging LINE
@app.route("/callback", methods=["POST"])
def callback():
    # get X-Line-Signature header value
    signature = request.headers["X-Line-Signature"]
    # get request body as text
    body = request.get_data(as_text=True)
    app.logger.info("Request body: " + body)
    # handle webhook body
    try:
        handler.handle(body, signature)
    except InvalidSignatureError:
        print("Invalid signature. Please check your channel access token/channel secret.")
        abort(400)
    return "OK"

# Text message handler (ECHO)
@handler.add(MessageEvent, message=TextMessage)
def handle_message(event):
    # Print event metadata
    print(event)

    # Retreive user metadata
    userid = event.source.user_id
    usermsg = event.message.text

    # Log user metadata on terminal
    print(f"User: {userid}")
    print(f"Message: {usermsg}")

    # Reply user
    line_bot_api.reply_message(
        event.reply_token,
        TextSendMessage(text=event.message.text)
    )

if __name__ == "__main__":
    # Run web service on server port
    port = int(os.environ.get("PORT", 8080))
    app.run(host="0.0.0.0", port=port)
Basically, the most important part of the code here is the # Text message handler section. This is function handles all TextMessages received from the client. There are few types of messages such as StickerMessage, ImageMessage, LocationMessage etc. Once our web server receives a TextMessage event, it would then trigger the following function. The event is basically dictionary (JSON obj) that looks something like this:
{
    "message": {
        "id": "10648174705250",
        "text": "This is the message from the client",
        "type": "text"
    },
    "replyToken": "4cf5fbfa805e4bacbfde5d60b2d8f8b6",
    "source": {
        "type": "user",
        "userId": "CLIENT_USER_ID"
    },
    "timestamp": 1569675030774,
    "type": "message"
}
So, we could actually process the message from our client using event.message.text, and use some keywords to trigger another function. Finally, the event.reply_token is used by the API to determine which client to reply, and we could simply reply them with the line_bot_api.reply_message() function, and TextSendMessage() them. Since we are an echo bot, we would just reply them the event.message.text.
ngrok - Webhooks
One final step before we could finally test our bot is to connect our LINE api to our hosting server. Of course, if you have a server available for deployment, or a cloud platform like Heroku, you're basically good to go. But if you need an domain name to connect to, you could use ngrok.
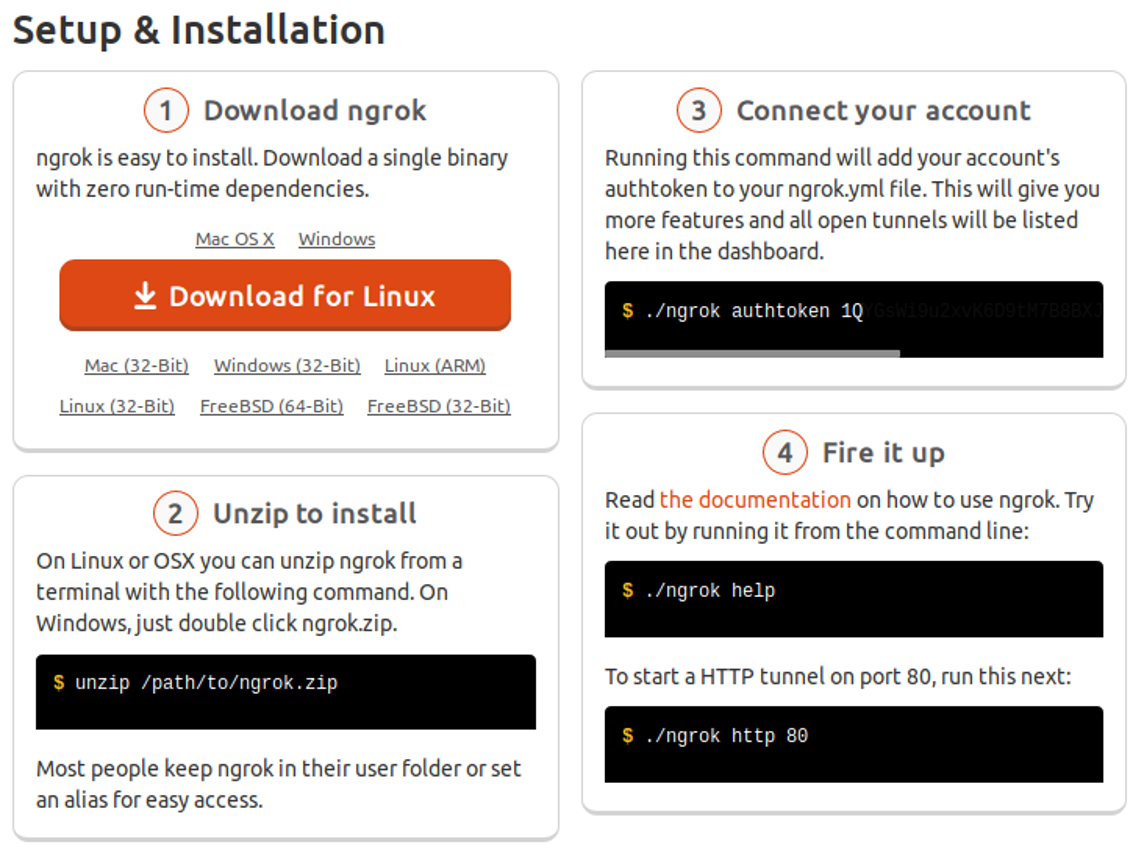
Ngrok creates a secured tunnel from your device and gives you a URL for you to connect to your server even if you're not within the local network. Besides that, it is actually very easy to setup. Follow the setup and installation procedures shown in the previous image and start your ngrok service. Once the service is running, you would see this interface on your CLI.
ngrok by @inconshreveable                                                                                                       (Ctrl+C to quit)

Session Status                online
Account                       Bird (Plan: Free)
Version                       2.3.40
Region                        United States (us)
Web Interface                 http://127.0.0.1:4040
Forwarding                    http://c37f3540.ngrok.io -> http://localhost:8888
Forwarding                    https://c37f3540.ngrok.io -> http://localhost:8888

Connections                   ttl     opn     rt1     rt5     p50     p90
                              24      0       0.00    0.00    0.03    0.93
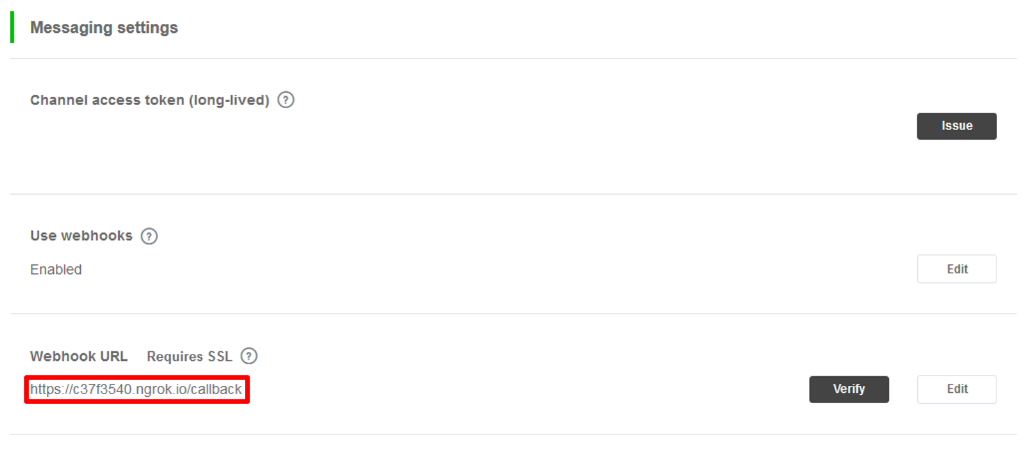
Note that this link has a time limit and the link would change everytime ngrok is re-run. Finally, copy the forwarding ngrok.io link and paste it to the webhook URL followed with /callback as shown in the image below. You could now verify your service using LINE Developer Console or send a message to your bot now and see the results.